ブログ:
Using Cameras in Embedded Linux Systems
This blog post explores various ways to view and record videos using a Computer on Module (CoM) or System on Module (SoM). The CoM is optimized for cost-sensitive applications and has no hardware encoder/decoder for video.
There is a saying that goes like this: “A picture is worth a thousand words.” Maybe that’s why the use of cameras in embedded systems has grown tremendously in recent years. They are used in different situations, including:
- Monitoring by a remote operator: Examples of this application are closed television circuits where an operator monitors the environment (probably the concierge of your building has one) or even the city monitoring by the police.
- Security video recording: Monitoring systems may or may not record video, many systems do not have an operator monitoring the system all the time, they just perform recording for evidence in case of an event.
- Embedded vision systems: Computer monitoring systems that process images to extract more complex information. We can see this in radars and some traffic monitoring systems in cities.
- Use as a sensor: Many clinical diagnostic systems are based on image analysis of the sample. Another example found in shopping smart windows that identify some characteristics of the user to provide specific marketing.
We will use our Colibri VF61 module, which is powered by NXP®/Freescale’s Vybrid processor, a heterogeneous dual core processor (Arm® Cortex-A5 + Arm Cortex-M4). In addition to the processor, the module has 256MB RAM and 512 MB Flash. In this article, we will be using only the Cortex™-A5. You can do various video-related tasks with these processors despite them not having specific hardware acceleration for it. Further information and instructions for the Colibri VF61 module can be found on the developers section of the Toradex website.
The cameras used were one Logitech HD 720p, a generic mjpeg USB camera module and an IP camera from D-Link model DCS-930L.
The Linux image used for this article has a desktop environment called LXDE, it is also our standard image. Our standard images can be found on our Developer's website here. The image version used in this article is V2.4. We will use a framework called GStreamer, which is widely used in the development of multimedia applications. GStreamer provides application’s multimedia service such as video editors, media streaming and media players. A series of plugins make GStreamer work with many different media libraries, such as MP3,ffmpeg, and others. Among these plugins are input and output elements, filters, codecs, and more.
This how-to has been written and tested with our V2.4 Linux image. At the time of its writing, the package feeds from V2.5 are missing one dependency for GStreamer. We are currently investigating this. As a workaround, you can download and install the missing dependencies manually from:
http://feeds.angstrom-distribution.org/feeds/v2015.06/ipk/glibc/armv7ahf-vfp-neon/base
It is necessary to install GStreamer, Video4Linux2 and a few additional packages. To do this, run the following commands in the module’s terminal:
opkg update

opkg install gst-plugins-base-meta gst-plugins-good-meta gst-ffmpeg
Now with the command gst-inspect you can see a list of the plugins and elements which have been previously installed. Shown below is an example of the list of plugins and elements that have been previously installed.
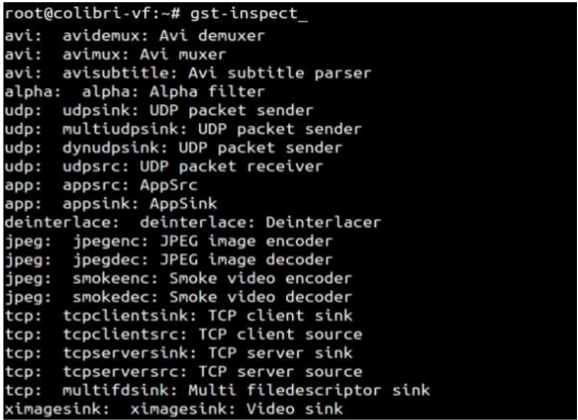
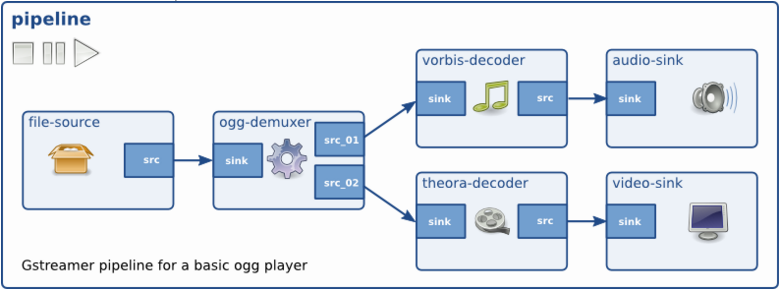
Based on the GStreamer Application Development Manual in Chapter 3, an element is the most important object class of GStreamer. Usually one creates a chain of connected elements and the data flows through these chained elements. An element has a specific function which can be reading from a file, data decoding, and displaying this data on the screen. Elements put together in a chain are called a pipeline, which can be used for a specific task, for example, video playback or capture. By default GStreamer contains a vast collection of elements, making it possible to develop a variety of media applications. Throughout this article we will use a few pipelines to give you a brief explanation about a few elements.
Below is an illustration of a pipeline for a basic Ogg player, using a demuxer and two branches, one each for audio and video. We can see that a few elements just have a src pad while others just have a sink pad or both src and sink pads.
For putting together a pipeline, one needs to check using gst-inspect if the desired plugins are compatible with one another. Let us take an example of the ffmpegcolorspace plugin. Just run the following in the terminal:
gst-inspect ffmpegcolorspace
And, you may see the following description of the plugin:
Factory Details:
  Long name: FFMPEG Colorspace converter
  Class: Filter/Converter/Video
  Description: Converts video from one colorspace to another
  Author(s): GStreamer maintainers
As well as the source and sink capabilities of the plugin:
SRC template: 'src'
    Availability: Always
    Capabilities:
      video/x-raw-yuv
      video/x-raw-rgb
      video/x-raw-gray

SINK template: 'sink'
    Availability: Always
    Capabilities:
      video/x-raw-yuv
      video/x-raw-rgb
      video/x-raw-gray
Another example is v4l2src. It has just the source capabilities, so it can source a video stream to another element. And inspecting the ximagesink element, we see that it has the rgb format sink capabilities.
Reading the documentation found in http://gstreamer.freedesktop.org/documentation/plugins.html and together with gst-inspect, allows to understand the capabilities of the elements and understand their properties.
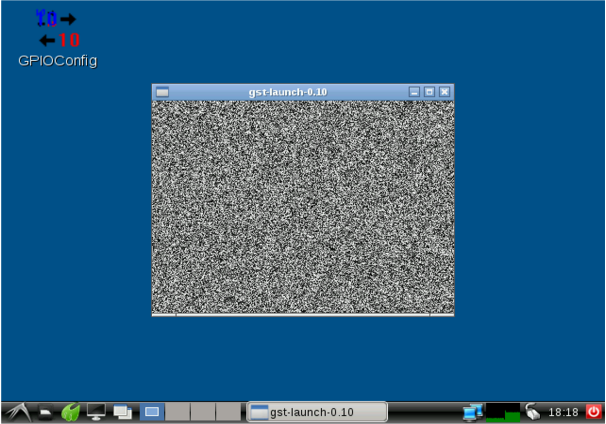
To view a video test pattern, use the following pipeline:
gst-launch videotestsrc ! autovideosink

The autovideosink \element automatically detects video output. The videotestsrc element is used to generate a test video in a variety of formats and can be controlled with the property "pattern".
gst-launch videotestsrc pattern=snow ! autovideosink
A plugged in webcam should appear as a device under /dev/videox where x can be 0, 1, 2, and so on, depending on the number of cameras connected to the module.

To view the webcam video in full screen, use the following pipeline:
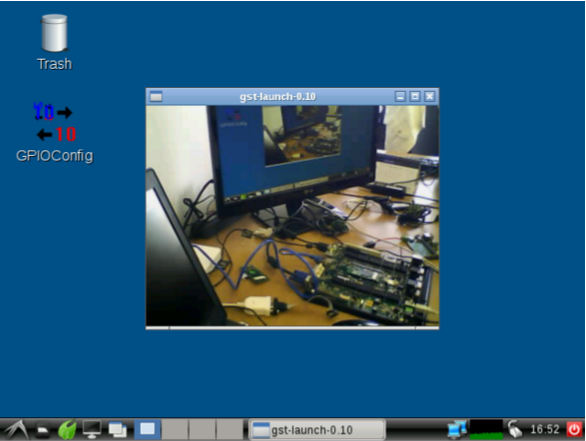
gst-launch v4l2src device=/dev/video0 ! ffmpegcolorspace ! ximagesink
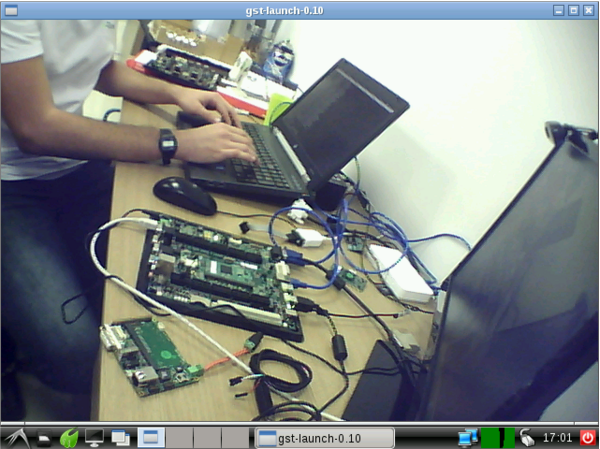
The following link shows the webcam video in full screen mode: video_webcam_fullscr.mp4
Video4Linux is an API and driver framework for capture and playback that supports several types of USB cameras and other devices. v4l2src is an element of the plugin Video4Linux2 that reads frames of a Video4Linux2 device which in our case is a webcam.
The ffmpegcolorspace element is a filter which is used to convert video frames from a wide variety of color formats. Cameras are providing data in YUV color format whereas displays typically operate using the RGB color format.
The ximagesink is a standard videosink element based on desktop X.
We can see that by using the top command, the memory and CPU processing used by gstreamer when displaying the webcam video. In this first case we have 77.9% CPU load.
top - 16:32:37 up  4:36,  2 users,  load average: 0.83, 0.28, 0.13
Tasks:  72 total,   1 running,  70 sleeping,   0 stopped,   1 zombie
Cpu(s): 69.3%us, 7.1%sy, 0.0%ni, 0.0%id, 0.0%wa, 0.0%hi, 23.6%si,0.0%st
Mem:  235188k total,   107688k used,   127500k free,       0k buffers
Swap:   0k total,       0k used,      0k free,     61232k cached

PID  USER  PR  NI VIRT  RES  SHR  S %CPU %MEM   TIME+   COMMAND
1509 root  20  0  39560 8688 6400 S 77.9  3.7   0:16.83 gst-launch-0.10
663  root  20  0  17852 8552 4360 S 19.7  3.6   4:12.32 X
1484 root  20  0  2116  1352 1144 R 1.3   0.6   0:00.80 top
It is also possible to display the video with some properties such as size and other parameters. The parameters' width, height, and framerate can be adjusted according to the settings supported by the camera. Execute the pipelines mentioned below for cameras 1, 2 or 3 respectively (in this case three cameras are connected to the module) to view the webcam video in a 320x240 format or specify the desired format.
gst-launch v4l2src device=/dev/video0 ! 'video/x-raw-yuv,width=320,height=240,framerate=30/1' ! ffmpegcolorspace ! ximagesink
gst-launch v4l2src device=/dev/video1 ! 'video/x-raw-yuv,width=320,height=240,framerate=30/1' ! ffmpegcolorspace ! ximagesink
gst-launch v4l2src device=/dev/video2 ! 'video/x-raw-yuv,width=320,height=240,framerate=30/1' ! ffmpegcolorspace ! ximagesink
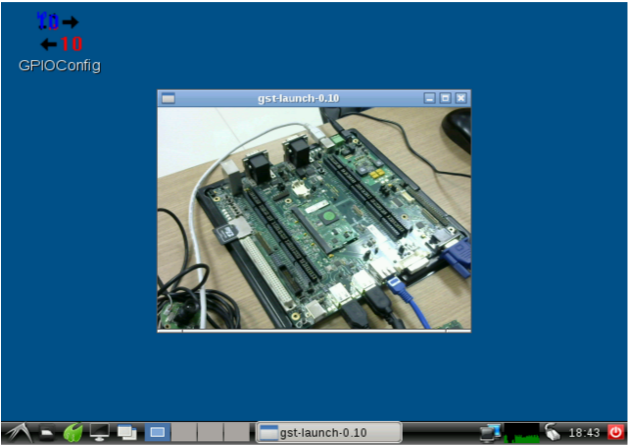
In this case CPU load was 28.2%.
You can also view two cameras simultaneously. The following pipeline was tested using a Logitech HD 720p camera and a generic MJPEG USB camera module.
gst-launch v4l2src device=/dev/video0 !
 'video/x-raw-yuv,width=320,height=240,framerate=30/1' ! ffmpegcolorspace
 ! ximagesink v4l2src device=/dev/video1
 'video/x-raw-yuv,width=320,height=240,framerate=30/1' ! ffmpegcolorspace !
 ximagesink
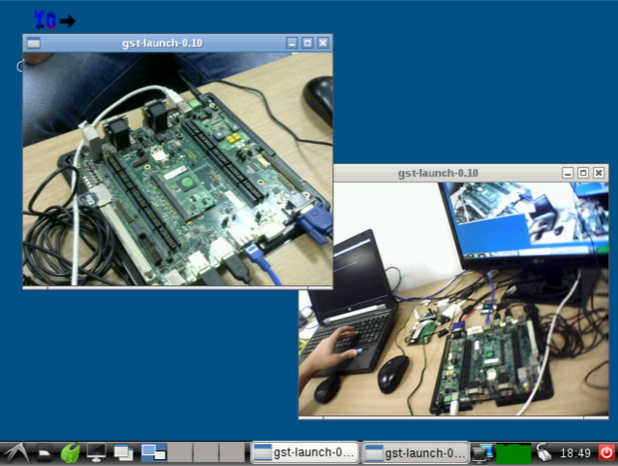
The following link contains a video showing the two webcams playing simultaneously: video_duas_webcams.mp4
In this case we had 64.8% CPU load.
To record a video in MP4 format we used the following pipeline:
gst-launch --eos-on-shutdown v4l2src device=/dev/video0 ! ffmux_mp4 ! filesink location=video.mp4
The --eos-on-shutdown command is used to close the file correctly. The ffenc_mjpeg element is an encoder for MJPEG format. ffmux_mp4 is a muxer for the MP4 format. The filesink element indicates that the data from the source v4l2 should be stored in a file and is not displayed in ximagesink element. You can also specify the file destination path.
To analyze the quality of the video recorded by the module, you can view the video at the following link: recording_video1.mp4
Recording a video with the above pipeline resulted in around 8% CPU load.
To view the previously recorded video, we use the following pipeline:
gst-launch filesrc location=video.mp4 ! qtdemux name=demux demux.video_00 ! queue ! ffdec_mjpeg ! ffmpegcolorspace ! ximagesink
In this case, the video source comes from a filesrc element, i.e., the video is coming from a file and not from a video device such as a webcam. This video has been encoded previously using mjpeg so ffdec_mjpeg decoder was used to decode the video.
Considering that the video was recorded with maximum resolution provided by the webcam, the CPU load was about 95%.
To view a video of a given URL use the following pipeline:
gst-launch souphttpsrc location=http://upload.wikimedia.org/wikipedia/commons/4/4b/MS_Diana_genom_Bergs_slussar_16_maj_2014.webm ! matroskademux name=demux demux.video_00 ! queue ! ffdec_vp8 ! ffmpegcolorspace ! ximagesink
souphttpsrc is an element that receives data as a client over the network via HTTP. In this case the location property receives a URL that contains a video file instead of a file on your computer. Note that the decoder ffdec_vp8 was used to decode the webm format.
In this case we had around 40% CPU load.
It is also possible to stream video from VF61 modules to a computer running Ubuntu Linux.
IP VF61 = 192.168.0.8
IP Ubuntu = 192.168.0.7
Run the following pipeline in VF61 module terminal:
gst-launch v4l2src device=/dev/video1 ! video/x-raw-yuv,width=320,height=240 ! ffmpegcolorspace ! ffenc_mjpeg ! tcpserversink host=192.168.0.7 port=5000
And the following pipeline in the host computer to view the streaming:
gst-launch tcpclientsrc host=192.168.0.8 port=5000 ! jpegdec ! autovideosink
Note that the IP addresses should be changed according to your setup. To check your IP address, run the ifconfig command in the terminal.
The following link shows a video demonstration of the example above: video_streaming_webcam.mp4
Using a Logitech HD 720p camera, we had around 65% CPU load.
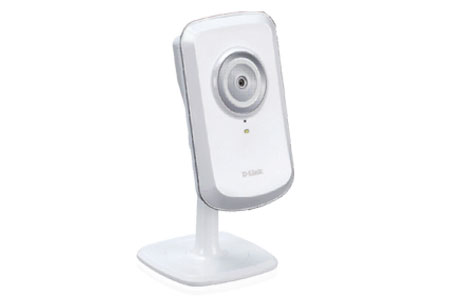
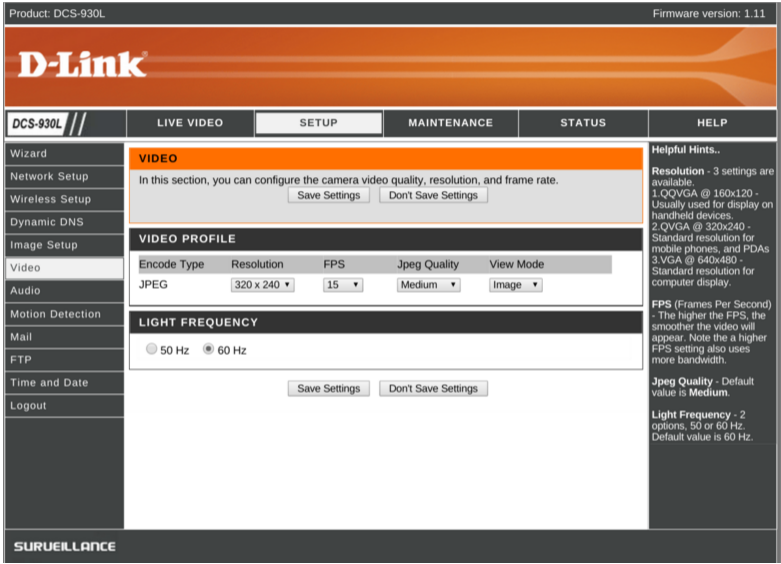
In this example, we have used an IP camera from D-Link model DCS-930L. The camera was set to stream video encoded in JPEG format with a resolution of 320x240 at 15 frames per second and an average quality JPEG. The performance of the processor differs according to the streaming settings of the IP camera.
To view the IP camera’s video, use the following pipeline in the module's terminal:
gst-launch -v souphttpsrc location='http://192.168.0.200/video.cgi' is-live=true ! multipartdemux ! decodebin2 ! ffmpegcolorspace ! ximagesink
The following link shows a video demonstration of the performance of the above mentioned example: video_streaming_ipcam.mp4
You can also record the IP camera video with VF61 module using the following pipeline:
gst-launch --eos-on-shutdown –v souphttpsrc location='http://192.168.0.200/video.cgi' is-live=true ! multipartdemux ! decodebin2 ! ffmpegcolorspace ! ffenc_mjpeg ! ffmux_mp4 ! filesink location=stream.mp4
To analyze the quality of the video, you can assess it at the following link: video_gravacao_ipcam.mp4
With the camera resolution set at 320x240, 15 frames per second and average quality JPEG, we had around 40% CPU load.
In this example we will be streaming video from the IP camera to the VF61 module where it will stream again to another IP address.
The following pipeline was executed in the VF61 module terminal:
gst-launch --eos-on-shutdown –v souphttpsrc location='http://192.168.0.200/video.cgi' is-live=true ! multipartdemux ! decodebin2 ! ffmpegcolorspace ! ffenc_mjpeg ! Tcpserversink host=192.168.0.12 port 5000
In this case the CPU load was around 95%.
To view the streaming data from the module on a Linux computer, use the following pipeline:
gst-launch tcpclientsrc host=192.168.0.8 port=5000 ! jpegdec ! autovideosink
| Test performed |
%CPU | %MEM |
| Displaying Video From a Webcam | 28.2 | 2.7 |
| Displaying Two Cameras Simultaneously | 64.8 | 3.1 |
| Recording Video | 8.0 | 4.9 |
| Video Playback | 95.0 | 3.9 |
| Video Playback Using HTTP | 41.9 | 4.1 |
| Video Streaming Using TCP | 66.0 | 3.6 |
| Displaying Video from IP camera | 25.2 | 3.3 |
| IP camera recording | 40.1 | 3.9 |
| TCP streaming IP to IP | 95.2 | 4.8 |
The duration of activities carried out in this article, including the theoretical research and study of various elements of GStreamer, can take a few days. Studying the plugins and using gst-inspect, one can check the properties of each plugin and then build a compatible pipeline between elements. However, there is a wide range of examples available on the Internet which will probably help in constructing the pipelines. It may be necessary for the reader to perform multiple researches, as was done to carry out this article. Installing and checking the plugins properties was necessary for the construction of pipelines and to find GStreamer elements compatible with the setup used in this article.
The NXP/Freescale Vybrid VF61 processors can often meet various needs concerning media and video processing without having specific hardware for such tasks. We were really surprised with the performance of this processor when executing video and image-related activities.
The VF61 Vybrid processor is a good option for cost-sensitive embedded designs that are not required to perform video processing tasks regularly. But when there is need for a high video processing with better performance, like seen in embedded vision systems, we indicate processors like iMX6, also from NXP/Freescale, which has specific hardware for video processing.
- https://www.toradex.com/computer-on-modules/colibri-arm-family/freescale-vybrid-vf6xx
- http://gstreamer.freedesktop.org/documentation/plugins.html
- https://wiki.lxde.org/en/Main_Page
- http://gstreamer.freedesktop.org/data/doc/gstreamer/head/manual/html/index.html
- http://developer.toradex.com/knowledge-base/camera-interface-on-toradex-computer-modules
- http://developer.toradex.com/knowledge-base/webcam-(linux)
- http://developer.toradex.com/knowledge-base/video-playback-(linux)#Video_Playback_on_Vybrid_Modules
- http://developer.toradex.com/knowledge-base/multi-camera-module-linux
- http://developer.toradex.com/knowledge-base/how-to-use-usb-webcam
- http://en.wikipedia.org/wiki/GStreamer
- http://www.freedesktop.org/software/gstreamer-sdk/data/docs/latest/gst-plugins-base-plugins-0.10/index.html
- http://pt.wikipedia.org/wiki/Codec
- http://pt.wikipedia.org/wiki/Codec_de_vídeo
- http://gstreamer.freedesktop.org/data/doc/gstreamer/0.10.36/manual/manual.pdf
- Image 2: http://gstreamer.freedesktop.org/data/doc/gstreamer/head/manual/html/images/simple-player.png
- Image 9: http://www.premiumstore.com.br/images/product/DCDLDCS930L_1.jpg
This blog post was originally featured on Embarcados.com in Portuguese. See here.
KIms - 7 years 8 months | Reply
It would be neat to see a sister-article to this, that looks at a front+rear facing car dash-cam with GPS and text overlay on the recordings, with a focus on file management and handling continuous recordings.