Blog:
Machine Learning - How to migrate from Raspberry Pi
Developing Machine Learning applications often raises several questions. Determining the optimal approach to data gathering, applying ML algorithms, and selecting the optimal device for optimization can be quite challenging.
Edge Impulse provides a platform that simplifies ML application development at the edge. Combined with the robust and easy-to-use Toradex Modules, it becomes the perfect opportunity to bring your projects to life.
Edge Impulse does not provide a guide specifically for Toradex modules, but, like many other services, they have guides for the Raspberry Pi. Using Torizon makes running a Ubuntu container straightforward, which allows you to follow the guide for the Raspberry Pi just as easily with a Toradex module. Therefore, I will use the Raspberry Pi guide to enable Edge Impulse on Toradex modules.
In this blog, you will see how to build a classification model that distinguishes between three distinct objects. I will use a Maivin, a device that integrates the Verdin iMX8M Plus System on Module with a camera in a ready-to-use package. With it, I can test the model in the CPU, GPU, and integrated NPU.
To connect a Toradex module to the Edge Impulse platform, you can follow the steps presented for Edge Impulse. I will use Torizon OS, a ready-to-use Linux Distribution with a built-in Docker runtime. Thus, the Edge Impulse installation using Docker becomes straightforward on Torizon.
On our target device, we need to run a Ubuntu container image in which we'll install the necessary packages and the Edge Impulse software. To grant the container access to the camera connected to the carrier board, we'll add specific flags as described in the developer article.
docker run -it -v /tmp:/tmp -v /var/run/dbus:/var/run/dbus \
    -v /sys:/sys --network=host \
    --env UDEV=1 --device-cgroup-rule='c 81:* rmw' \
    --entrypoint /bin/bash ubuntu:20.04
Now that we're inside the container, we can proceed with installing the required dependencies by executing the following commands:
apt-get update
apt-get install wget -y

wget -qO- https://raw.githubusercontent.com/nvm-sh/nvm/v0.39.3/install.sh | bash
source ~/.bashrc
nvm install 12

apt install -y gcc g++ make build-essential nodejs sox gstreamer1.0-tools gstreamer1.0-plugins-good gstreamer1.0-plugins-base gstreamer1.0-plugins-base-apps vim v4l-utils usbutils udev

npm config set user root
npm install edge-impulse-linux -g --unsafe-perm

/lib/systemd/systemd-udevd --daemon
To speed up the process, I've already built a container image. So, if you want to skip the installation step, run the container using the following command.
Note that the container was built for ARM 64-bit architecture.
docker run --rm -it -v /tmp:/tmp -v /var/run/dbus:/var/run/dbus \
    -v /sys:/sys --network=host \
    --env UDEV=1 --device-cgroup-rule='c 81:* rmw' \
    --entrypoint /bin/bash otaviocpontes/edge-impulse
With the dependencies installed, we are ready to start building our model.
You can connect your device to the Edge Impulse platform and collect images directly with the Maivin by running the following command:
edge-impulse-linux
An alternative option is to collect images using another device, such as a mobile phone.
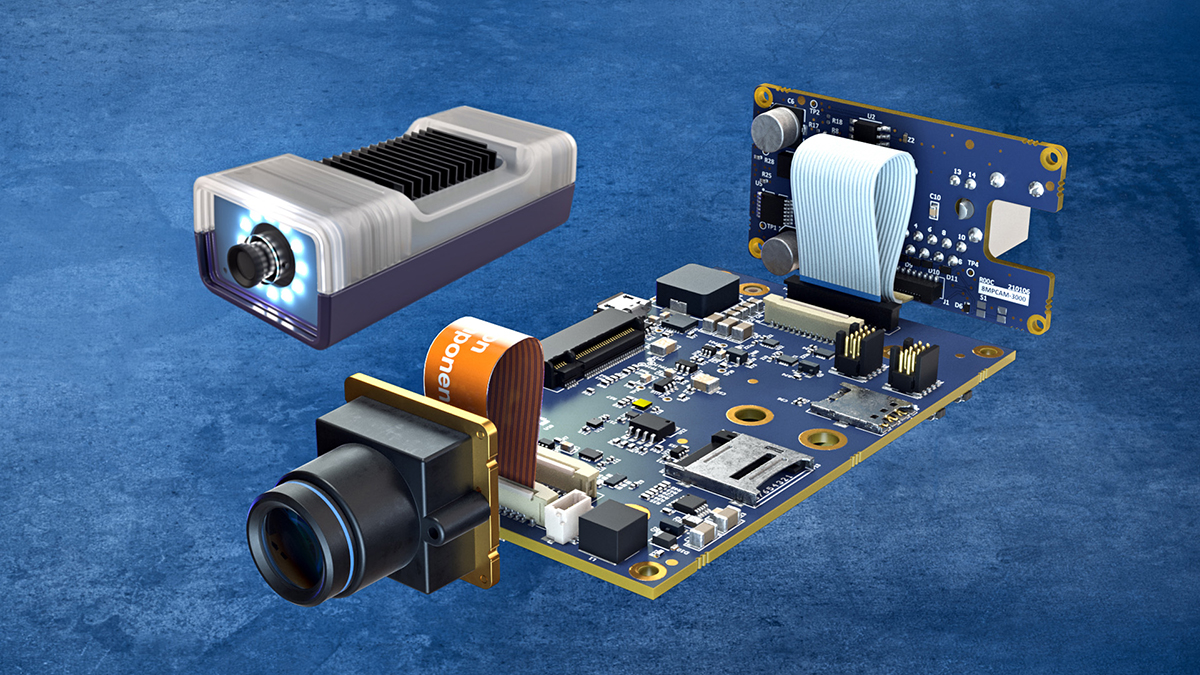
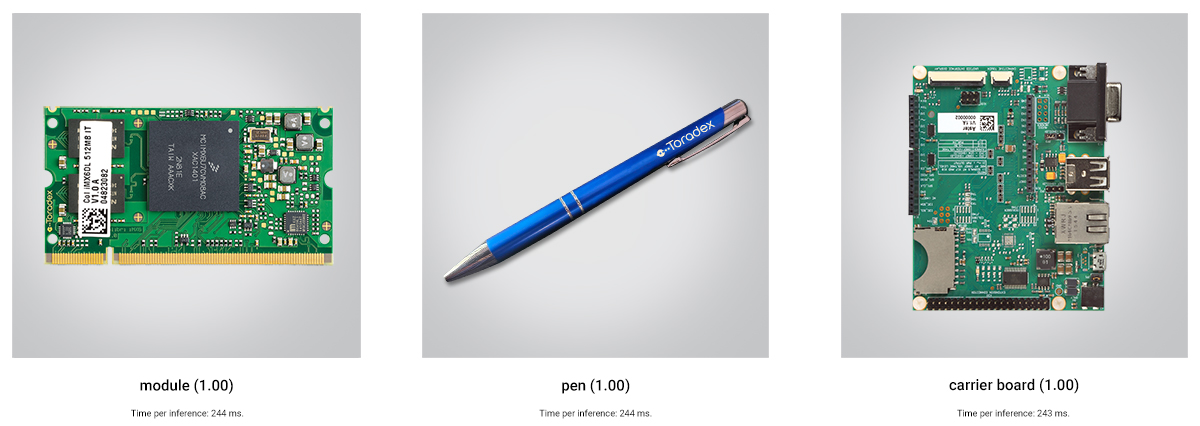
We collected data from three distinct objects:
- A Toradex Carrier Board
- A Toradex Module
- A pen
To create a robust dataset, we gathered 50 images of each object and another 50 images that did not contain any of these objects.
It is crucial to capture the objects from various angles and distances to ensure effective object generalization. Although a substantial amount of data is typically required, Edge Impulse offers pre-trained models that can provide excellent results even with this small amount of data.
Once the data is collected, navigate to your Dashboard and locate the Perform train/test split button. By clicking this button, the dataset will be split into train and test data, which helps prevent the model from overfitting to the data.
At this point, we're ready to create our Impulse.
An Impulse is a set of instructions that processes the raw data and turns it into meaningful information at the application level. It learns rules from the data through three blocks:
- Image data: This block resizes the collected image and fits it to the Machine Learning algorithm.
- Image processing block: Transforms the collected images into features the Machine Learning algorithm uses.
- Learning block: Where the training of the Machine Learning model will occur.
The setup used for this tutorial is represented in the image below:
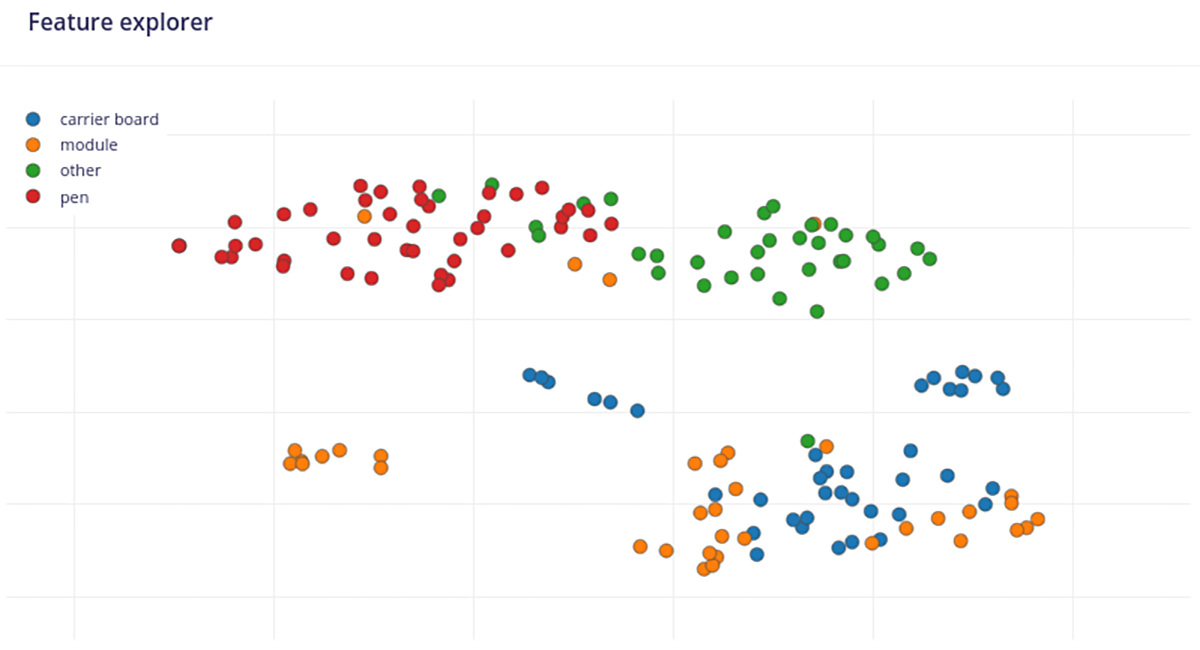
This step is straightforward. Choose RGB as the color depth, click Save Parameters, and then on the new page, click Generate Features. As a result, a Feature Explorer graph will appear, allowing us to see the clustering and obtain insights about the dataset quality and potential model performance.
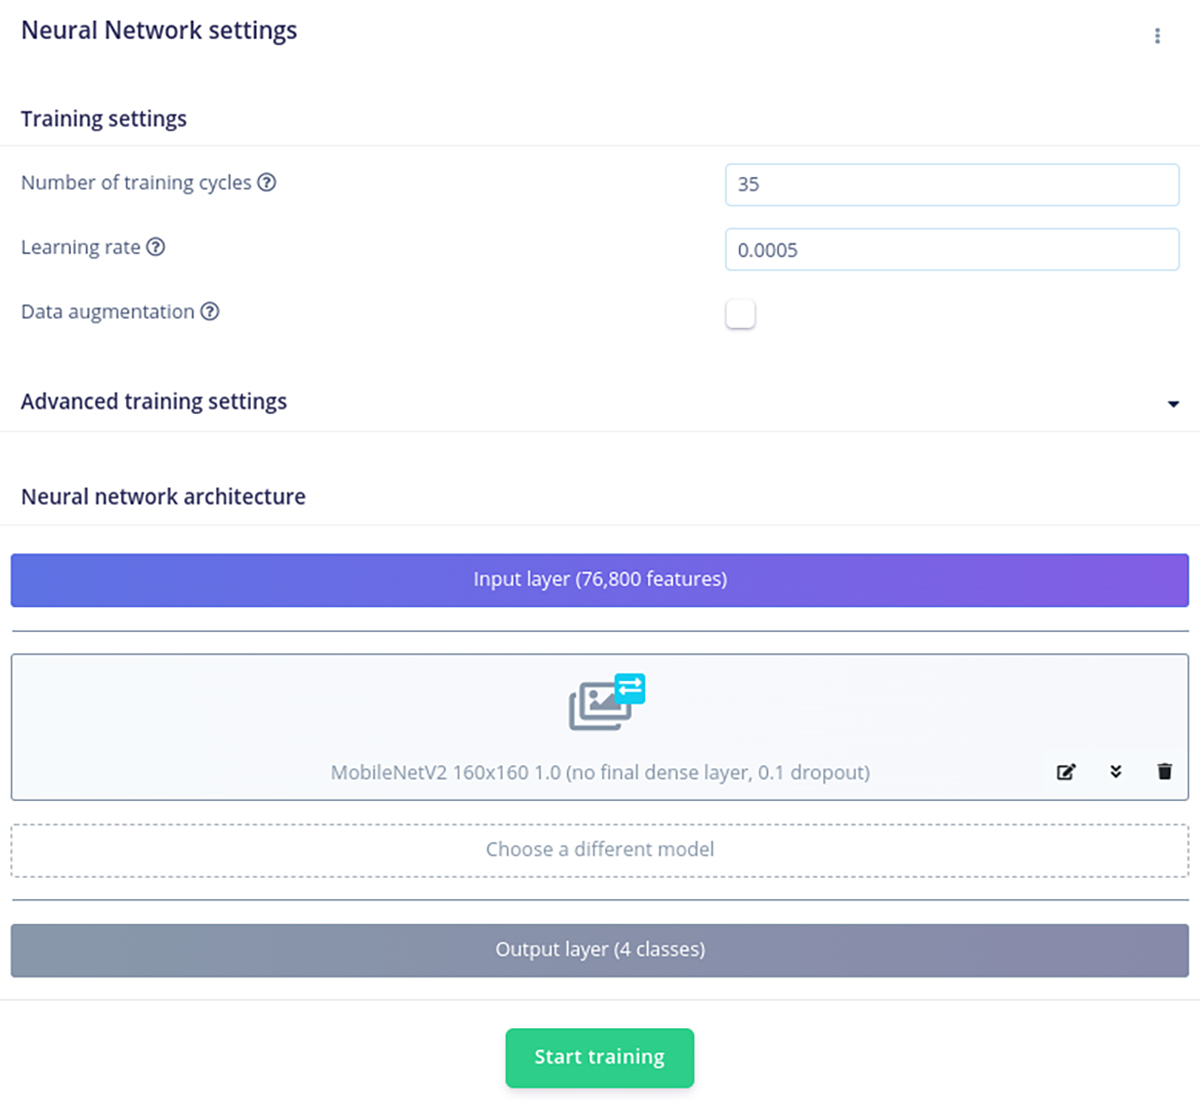
Now, we'll move on to train our model. I used the following setup:
Training a model is typically one of the most challenging steps in developing machine-learning applications. However, as Edge Impulse simplifies the process, we can achieve good results with just a few adjustments to the model parameters.
Now, we have to wait for the model to be trained. Please note that this process can take up to 20 minutes with the chosen parameters.
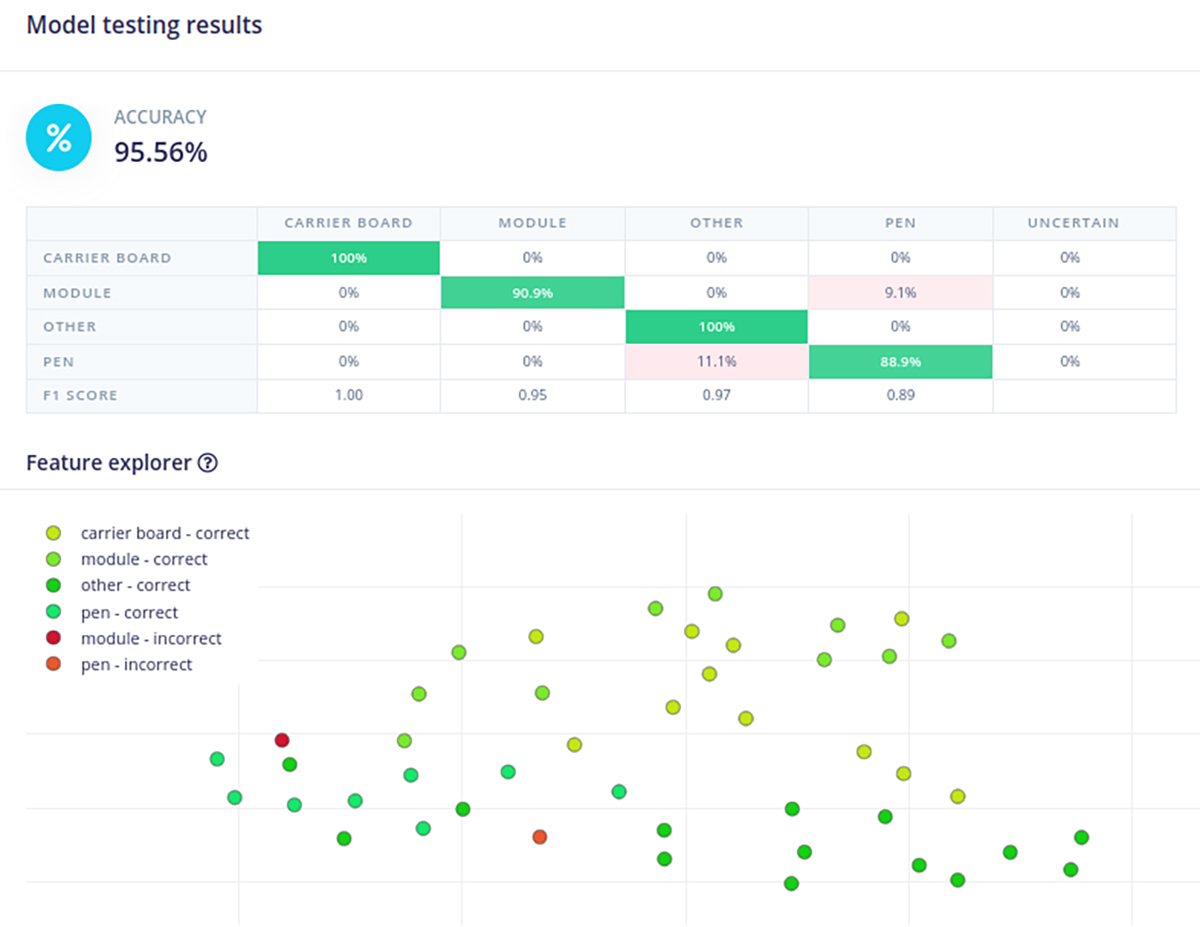
After training the model, we need to evaluate its performance by testing it on the data we previously split into testing during the data acquisition step. This process allows us to estimate the model's capability to classify new data.
We can see how our model continuously classifies the data our camera captures. For this, run the following command inside the container you've created:
edge-impulse-linux-runner
A web page that shows the live classification results will be available at the https://
Finally, we downloaded the quantized (int8) and float32 models to test their performance on the Verdin iMX8MP. The quantized model, which uses 8-bit integers instead of floating-point math, is optimized for accelerators. Thus, as the device features an NPU, a CPU, and a GPU, we also made performance comparisons of the model for these three components.
Note that the accuracy for both models was very similar, so measuring the models' performance was primarily based on their inference time, i.e., how long the model takes to estimate an outcome based on new observations. The table below presents the obtained classification results for a pen image not used for training.
| int8 quantized | float32 | |||
| Inference Time | Confidence | Inference Time | Confidence | |
| NPU Support | 3.694 ms | 99,6% | 212.646 ms | 99,9% |
| GPU Support | 169.327 ms | 99,6% | 113.868 ms | 99,9% |
| CPU only | 24.461 ms | 99,6% | 18.644 ms | 99,9% |
As the table above presents, the NPU offers optimal performance while keeping excellent confidence.
In this blog, we saw an introduction to Edge Impulse and how it simplifies machine learning application development. With a small amount of data, we've built a model that easily differentiates between three distinct objects.
You've also seen how easy it is to migrate Raspberry Pi projects to Toradex modules using Docker and Torizon OS. Next, I recommend the many community projects for Raspberry Pi freely available for you to explore and use with your Toradex hardware.
Let me know what you try out and what else you want to see running on Torizon.
See you in our next blog post! Until then, feel free to comment below.
- Building Machine Learning Software with Reference Images for Yocto Project
- How to use Cameras on Torizon
- Getting Started
- TensorFlow Lite
 Otavio Pontes, Embedded Linux Developer - Intern, Toradex