Application Debugging Over Ethernet Using Visual Studio 2008
One of the simplest setups in order to carry out application debugging on Colibri System on Modules (SoMs), is to connect the Host PC to the Colibri target via a USB cable (ActiveSync) and Ethernet. There are instances, however, wherein the USB client port is unavailable, so only Ethernet can be used for debugging.
Given below is the outline on how to setup the host PC and the target to carry out the application debugging;
One Time Preparation
Lookup the Colibri's IP Address
On the target device, either
- double click on the Ethernet icon in the Windows CE system tray, or
- open a command prompt and type
ipconfig
In the default configuration, the Colibri is setup to get its IP address from a DHCP server. So the address can change after a reboot of the target.
Prepare Visual Studio 2008 (VS2008)
In VS2008, select the menu
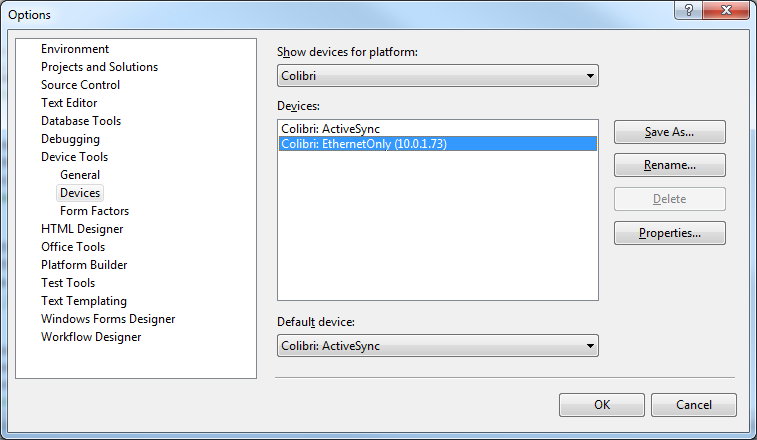
Tools -> Options ==> Device Tools ==> Devices

- Select any existing device and click on
Save As... - Give the device a reasonable name, e.g.
Colibri: Ethernet (10.0.1.173) - Optionally, you can change the Default device to the new device.
- Select the newly created device and click on
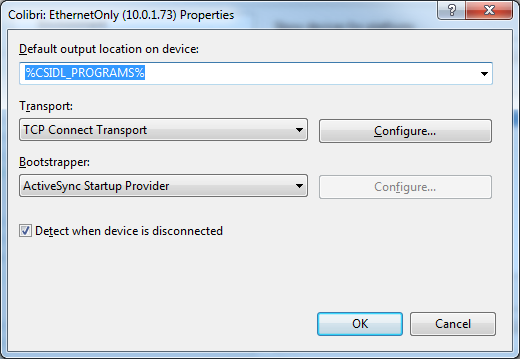
Properties
to get to the next dialog.
- Select Transport:
TCP Connect Transport
and press
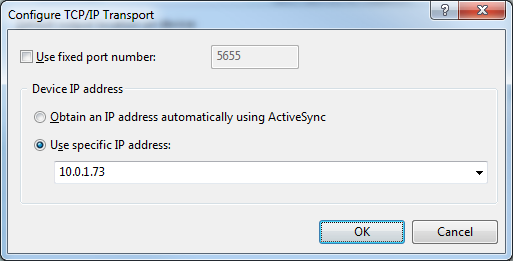
_Configure_
- Select
Use specific IP address
and enter the Colibri's IP address - Press OK three times to close all open dialogs.
Locate the Target Files and Copy Them to the Colibri
There are several files which need to be copied to the target device manually. Amongst these, are 2 applications which are required to be started manually each time when commencing a debugging session.
- Locate the files. In a standard VS2008 installation, they are here:
  C:\Program Files\Common Files\microsoft shared\CoreCon\1.0\Target\wce400\armv4i
  or
  C:\Program Files (x86)\Common Files\microsoft shared\CoreCon\1.0\Target\wce400\armv4i
- On a USB flash drive, or an SD card, create a folder \AutoCopy
- Copy the following files into the AutoCopy folder
- clientshutdown.exe
- CMAccept.exe
- ConmanClient2.exe
- DeviceAgentTransport.dll
- DeviceDMA.dll
- eDbgTL.dll
- TcpConnectionA.dll
Repeat for Each Debug Session
Commence the Debug Session on the Colibri
- Insert the storage device into your target Colibri and boot the module. The files will be copied to the Colibri's root folder.
- Through the Start menu, open a command prompt and type
conmanclient2
to start this service. The command prompt will remain blocked. - Through the Start menu, open a 2nd command prompt and type
cmaccept
to start this service.
After you have started CMAccept, you only have 3 minutes to commence the debug session on the VS2008 side.
Start the Debug Session on VS2008
- in VS2008, select the menu
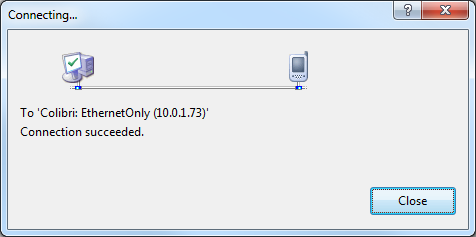
Tools -> Connect To Device... - Select the newly generated device and click on Connect
VS2008 will start to communicate with the Colibri. Another dialog will appear and announce a successful connection.
Latest News
New Release:
Torizon OS 7.1.0 Quarterly Release